
Laminate flooring is a popular choice for homeowners seeking a cost-effective, stylish, and durable flooring solution. However, installing laminate flooring requires the right tools and techniques. That’s where a laminate floor installation kit comes in handy. In this guide, we will dive deep into the essentials of a laminate floor installation kit, how to use it effectively, and tips to ensure a flawless flooring project.
Have you ever wondered how to achieve a perfect laminate floor installation without hiring a professional? Well, you’re in luck! With a laminate floor installation kit, you can tackle this DIY project with confidence. In this comprehensive guide, we’ll cover everything you need to know about using a laminate floor installation kit, from the tools included to step-by-step installation instructions. Let’s get started!
What is a Laminate Floor Installation Kit?
A laminate floor installation kit is a collection of tools designed to make the installation of laminate flooring easier and more efficient. These kits typically include essential items that help with measuring, cutting, laying, and securing the laminate planks. Whether you’re a seasoned DIY enthusiast or a beginner, having the right tools at your disposal can make a world of difference.
What’s Inside a Laminate Floor Installation Kit?
Most laminate floor installation kits come with the following tools:
- Tapping Block: A tapping block ensures that the laminate planks are snugly fit together without damaging the edges.
- Pull Bar: A pull bar helps in fitting the last row of planks near the wall.
- Spacers: Spacers maintain the expansion gap between the planks and the wall.
- Rubber Mallet: A rubber mallet is used to tap the planks into place without causing damage.
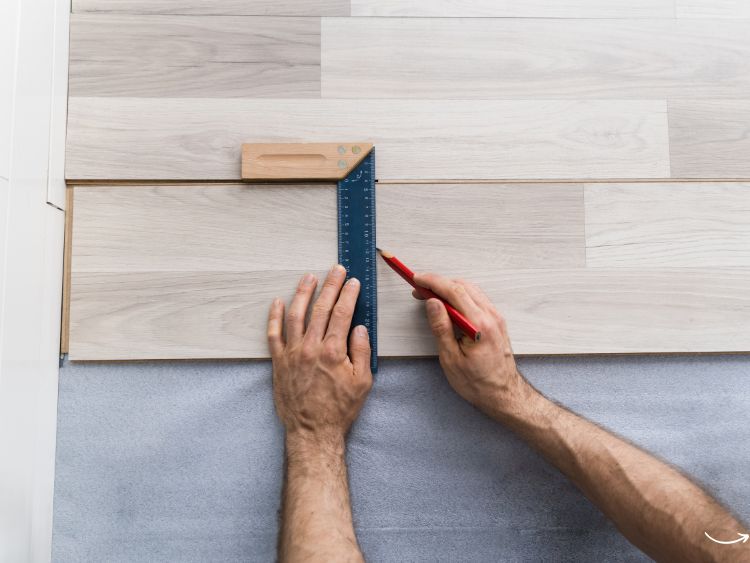
- Measuring Tape: Accurate measurements are crucial for a precise fit.
- Utility Knife: A sharp utility knife is essential for cutting the laminate planks to size.
Why Use a Laminate Floor Installation Kit?
You might be wondering, “Do I really need a laminate floor installation kit?” The answer is a resounding yes! Here are a few reasons why:
- Efficiency: The right tools streamline the installation process, saving you time and effort.
- Precision: Accurate measurements and proper fitting ensure a professional-looking finish.
- Durability: Properly installed laminate flooring lasts longer and withstands wear and tear better.
Preparing for Installation
Before you begin the installation, it’s crucial to prepare your workspace and gather all necessary materials. Here are some steps to get you started:
1. Acclimate the Flooring
Laminate flooring needs to acclimate to the room’s temperature and humidity. Lay the planks flat in the installation area for at least 48 hours before starting.
2. Prepare the Subfloor
Ensure the subfloor is clean, dry, and level. Remove any existing flooring and debris. If necessary, use a leveling compound to even out any irregularities.
3. Gather Your Tools
In addition to your laminate floor installation kit, you’ll need a few extra tools:
- Circular saw or jigsaw for cutting planks
- Safety goggles and gloves
- Pencil and straight edge for marking cuts
Step-by-Step Installation Guide
Now that you’re prepared, let’s dive into the installation process. Follow these steps for a seamless installation:
Step 1: Plan Your Layout
Start by planning the layout of your laminate flooring. Measure the room and calculate the number of planks you’ll need. It’s essential to stagger the joints for a natural look and added stability.
Step 2: Lay the Underlayment
An underlayment provides a moisture barrier and adds cushioning. Roll out the underlayment and trim it to fit the room, ensuring there are no overlaps.
Step 3: Install the First Row
Place spacers along the walls to maintain the expansion gap. Begin laying the first row of planks, starting from the left corner of the room. Use the tapping block and rubber mallet to secure the planks together.
Step 4: Continue Laying Planks
Continue laying the planks, ensuring the joints are staggered. Use the pull bar to fit the last row of planks near the wall.
Step 5: Cut Planks to Fit
Measure and cut the last row of planks to fit the remaining space. Use a circular saw or jigsaw for precise cuts. Don’t forget to wear safety goggles and gloves!
Step 6: Install Transition Molding
Install transition molding between the laminate flooring and adjacent surfaces, such as carpet or tile. This provides a smooth transition and a polished look.
Step 7: Remove Spacers and Install Baseboards
Once all the planks are in place, remove the spacers and install baseboards to cover the expansion gap. Use a nail gun or adhesive to secure the baseboards.
Tips for a Flawless Installation
Achieving a flawless laminate floor installation requires attention to detail and a few expert tips. Here are some pointers to keep in mind:
- Check for Level Subfloor: An uneven subfloor can cause gaps and uneven planks. Use a level to ensure the subfloor is even before starting.
- Use Proper Tapping Techniques: Avoid damaging the planks by using the tapping block and rubber mallet gently. Apply even pressure to ensure a snug fit.
- Leave an Expansion Gap: Laminate flooring expands and contracts with temperature changes. Always leave an expansion gap around the perimeter of the room.
- Stagger Joints: Staggering the joints adds stability and creates a more natural look. Aim for at least 12 inches of stagger between adjacent rows.
- Inspect Planks Before Installation: Check each plank for defects or damage before installation. This ensures a uniform and flawless finish.
Common Mistakes to Avoid
While installing laminate flooring is a straightforward process, there are common mistakes that can lead to subpar results. Avoid these pitfalls to ensure a successful project:
- Skipping Acclimation: Failing to acclimate the planks can result in gaps and warping.
- Incorrect Spacing: Not using spacers or maintaining the expansion gap can cause buckling and damage.
- Rushing the Process: Take your time to ensure each plank is properly fitted and aligned.
FAQs about Laminate Floor Installation Kits
What tools are essential in a laminate floor installation kit?
A laminate floor installation kit typically includes a tapping block, pull bar, spacers, rubber mallet, measuring tape, and utility knife.
Can I install laminate flooring without a kit?
While it’s possible to install laminate flooring without a kit, having the right tools makes the process easier and more efficient. A kit ensures proper fitting and reduces the risk of damage.
How long does it take to install laminate flooring?
The installation time depends on the room size and your experience level. On average, it takes about 1-2 days to install laminate flooring in a standard-sized room.
Do I need to remove baseboards before installing laminate flooring?
Removing baseboards makes the installation process easier and provides a cleaner finish. If you prefer not to remove them, you can use quarter-round molding to cover the expansion gap.
How do I clean and maintain laminate flooring?
Laminate flooring is low-maintenance. Regularly sweep or vacuum to remove dust and debris. Use a damp mop with a mild cleaner for deeper cleaning. Avoid using excessive water or harsh chemicals.
Conclusion
Installing laminate flooring can be a rewarding DIY project, especially with the help of a laminate floor installation kit. By following the steps outlined in this guide, you’ll achieve a professional-looking finish that enhances the beauty and value of your home. Remember to take your time, use the right tools, and follow the expert tips to ensure a flawless installation.
Authoritative Links
For further reading and resources on laminate floor installation, check out these authoritative links:
- https://www.diynetwork.com/how-to/rooms-and-spaces/floors/how-to-install-laminate-flooring
- https://www.hgtv.com/design/remodel/interior-remodel/how-to-install-laminate-flooring
- https://www.thisoldhouse.com/flooring/21018172/how-to-lay-a-laminate-floor
- https://www.familyhandyman.com/project/laminate-flooring-installation/
By following this comprehensive guide and utilizing your laminate floor installation kit, you’ll be well on your way to creating a stunning and durable floor that you can be proud of.